
Error Code 6A00 apparently means that the "auto-purge" unit is not operating correctly. The auto-purge unit is three "squeegees" that move horizontally along guides to wipe across the print head nozzles after printing to remove the excess ink. When the squeegees are fully-extended, the ink on them is (mostly) removed as the squeegees pass by a plastic blade that scrapes off the ink, pivots, and dumps this ink into porous pads. When the printer is idle, these porous pads are likely pushed-up against the bottom of the print head to keep the nozzles from drying-out and clogging. If the squeegee mechanism won't fully extend and retract, or the pads won't move up (to seal against the bottom of the print head nozzles) and down (so the print head carriage can move freely from its parking position at the right), then an Error Code 6A00 is displayed.
Much checking on the Internet showed that many models of Canon inkjet and multi-function printers can have this error, and a particularly good page at http://FixYourOwnPrinter.com was here. Still, there were many different descriptions of the problems and their solution. I was so happy that this led me to understanding the problem and fixing it, that I hope this can help others save money and avoid throwing out an (almost) perfectly good printer.
Firstly, this problem and the solution is basically the same for many models of Canon inkjet printers, so even if you have a different model, if you have an Error Code 6A00, the following should be of help.
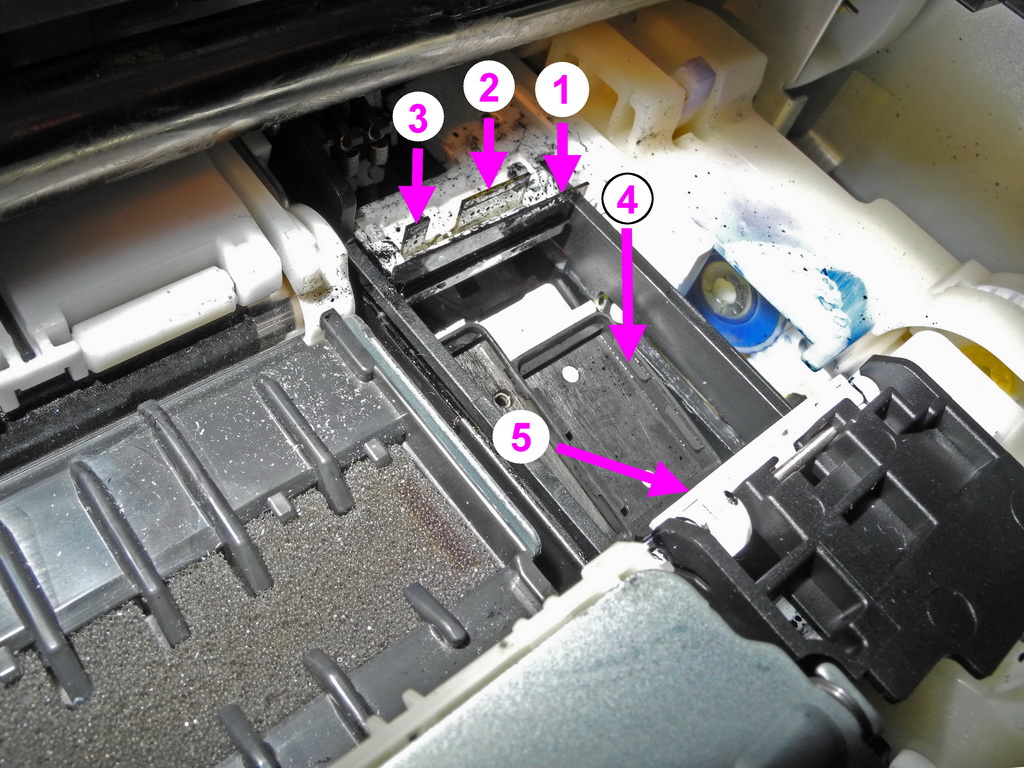
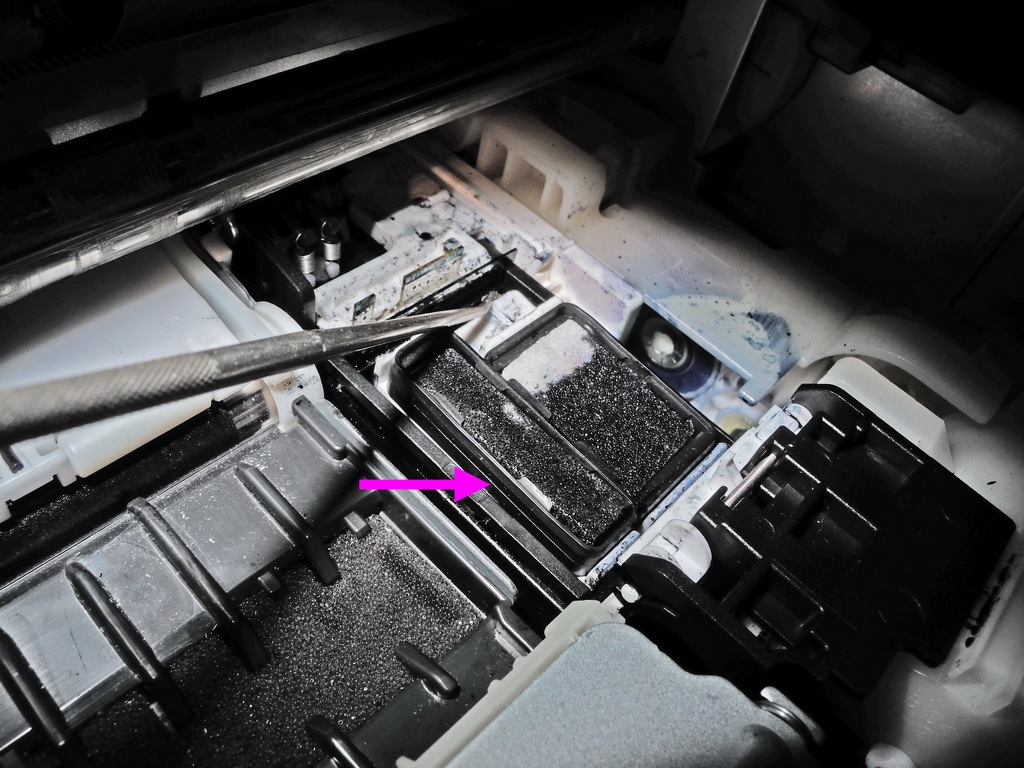
This may take an hour or two, so it is worth getting properly set-up. You'll need to get light down into the lower-right part of the printer carriage area, as shown by 2. You'll also need some water and paper towels cut into strips about 2 cm wide. You do not need any tools and you do not need to remove any screws or side panels (as I wasted my time doing).
Once you open the printer lid (to access the ink cartridges) and the print carriage moves to the centre, un-plug the printer and push the print head carriage to the left (as shown by 1).
While accessing the offending parts of newer models of Canon printers is somewhat easier, it is quite difficult for the MX850. All the work will be done to the "auto-purge unit", which is at the right side of the print head carriage, as shown by 2.
Image 2 of 11
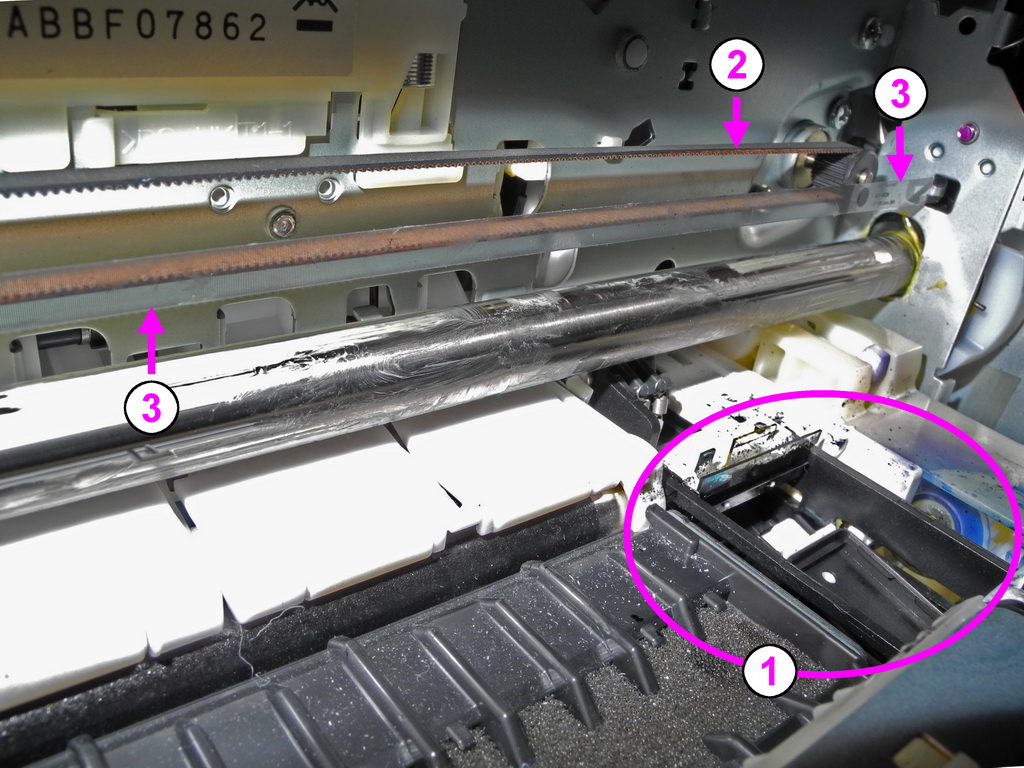
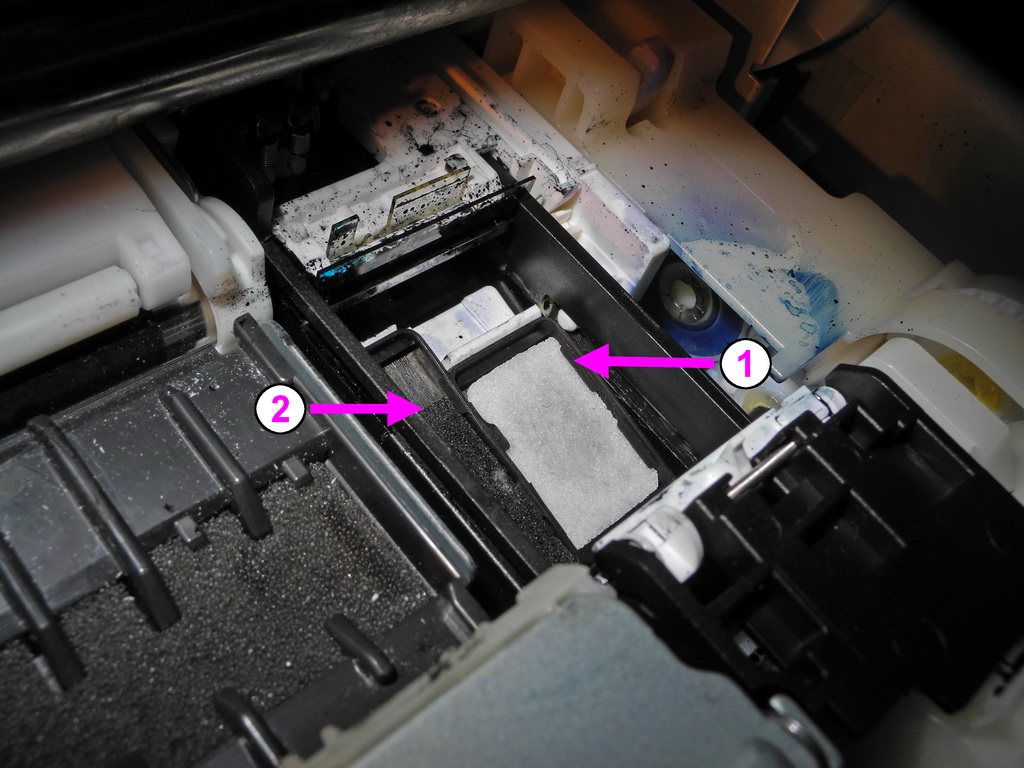
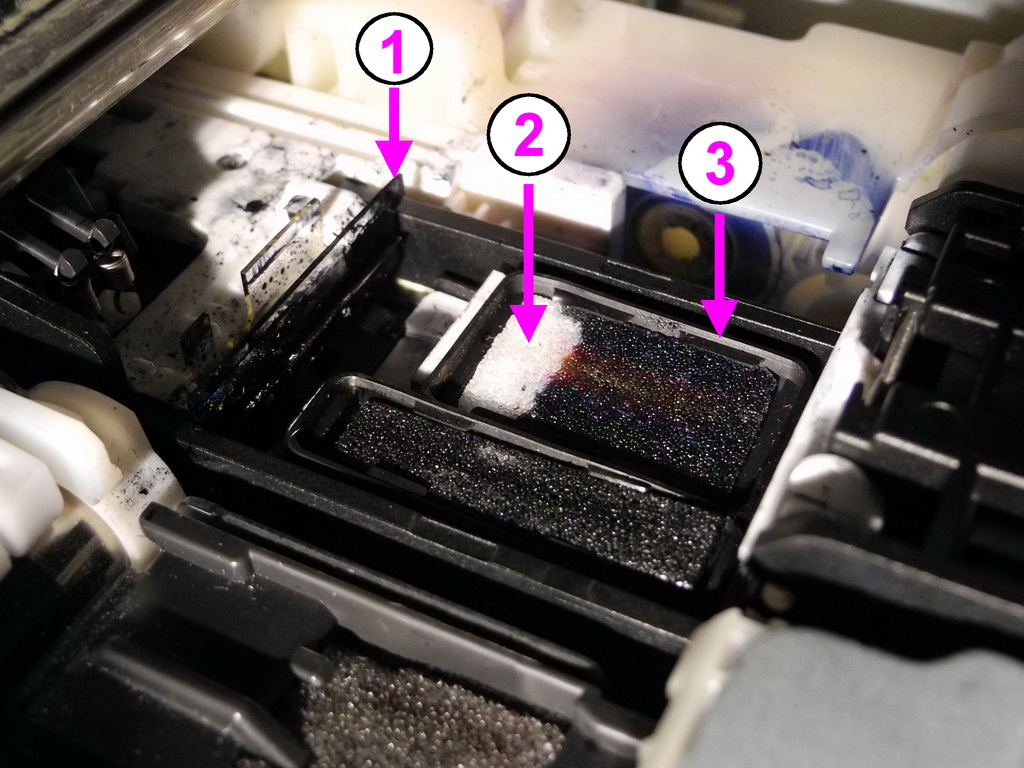
The first step is to remove the pads which absorb the ink left on the nozzles after printing. These are in two black rubber trays in the centre of circle 1. These pads can just be pulled up by getting your fingernail behind them and lifting. The far tray (and the only one visible in this photograph) is for the colour inks (in this photograph, the pad has already been removed).
It is really important to not drop the pads into the printer (if you do, you probably won't be able to retrieve it as the printer is ridiculously difficult to take apart and reassemble – especially if it is a multi-function printer such as this).
Image 3 of 11
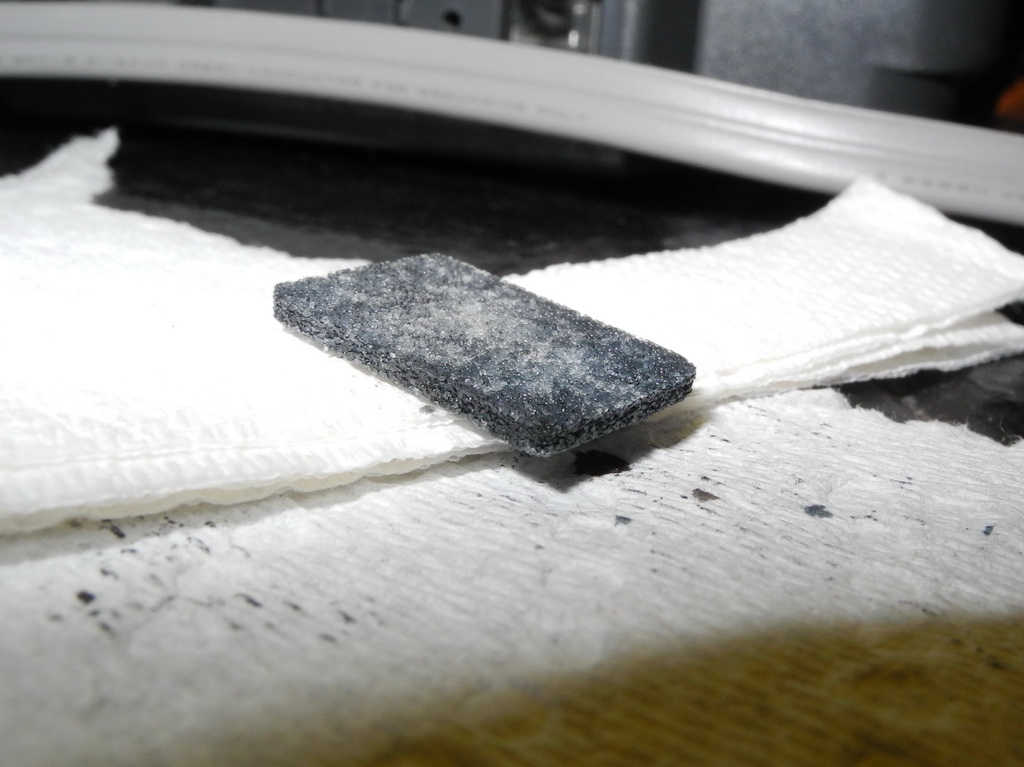
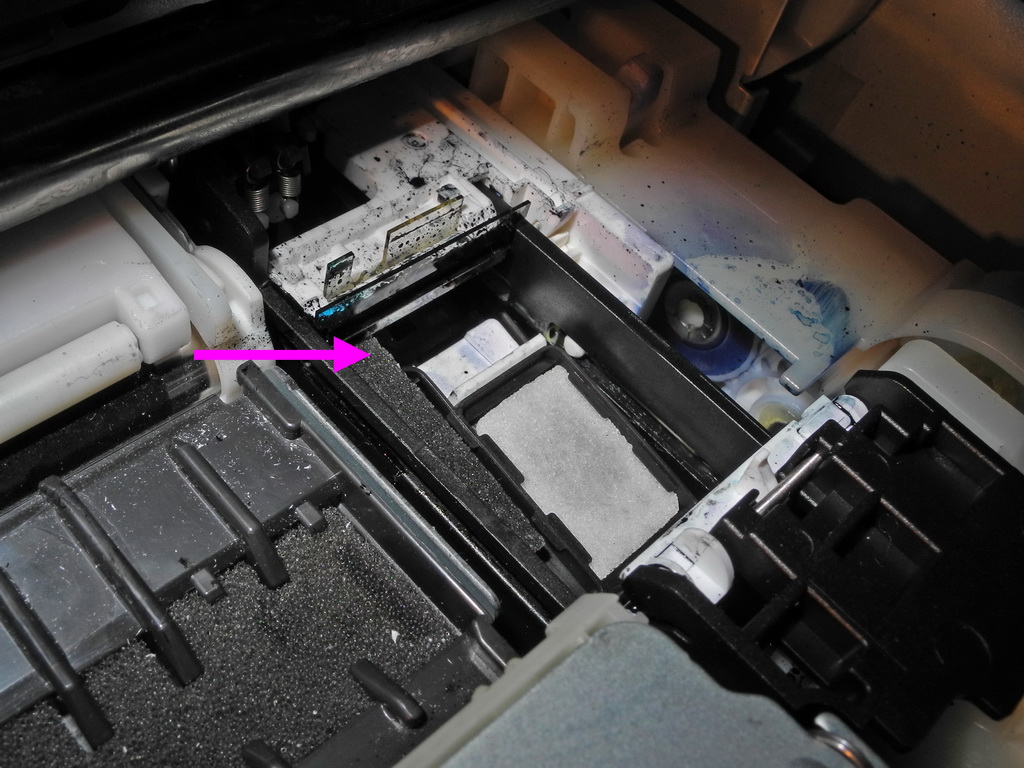
You may need to push the pad trays down to get at that front edge – as you can see, in my case, the entire problem was that the trays wouldn't return to their "up" position (note here the pad trays are stuck down below the level of the squeegees), so it was easier to get at the front of the squeegees.
Before returning the pads (which are brittle) to their trays, use the damp paper towel strips to clean the ink off everything, including the guides for the squeegees and make you can easily pull the squeegee mechanism out and it smoothly retracts (you'll need to push the pad trays down to do this).
Note the two holes below each pad position, hoses below suck the excess ink out of the pads and dump it into thick absorbant pads inside the printer. Make sure these holes are not clogged.
For some printers the problem is apparently that the squeegee is stuck in an extended position on its rails (so would be over the pad trays), and won't retract back to the top-left. Use damp paper towel strips to clean ink off the rails.
Image 7 of 11
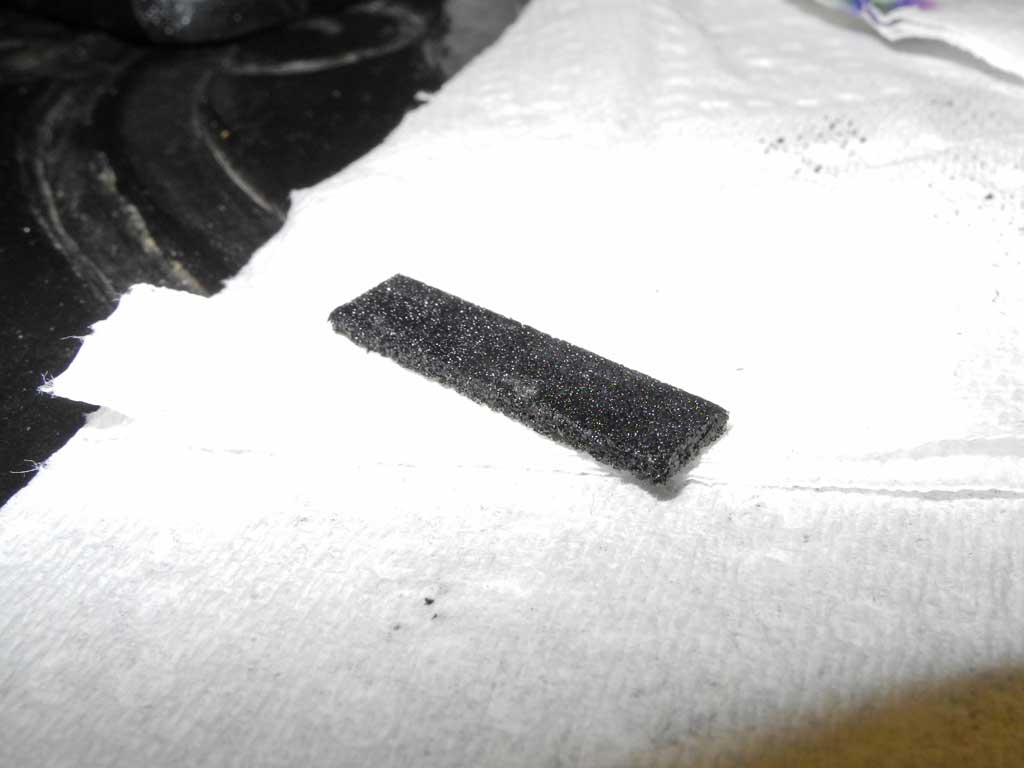
Again a warning (because it happened to me) – be sure you don't drop a pad into the printer, as you won't likely won't be able to retrieve it, even if you turn the printer upside-down and shake it all over the place (hopefully you can scavenge a pad from another broken Canon printer, the one's I have seen are the same sizes). I was able to disassemble my MX850 printer and retrieve the pad, but it took many hours.
Image 8 of 11
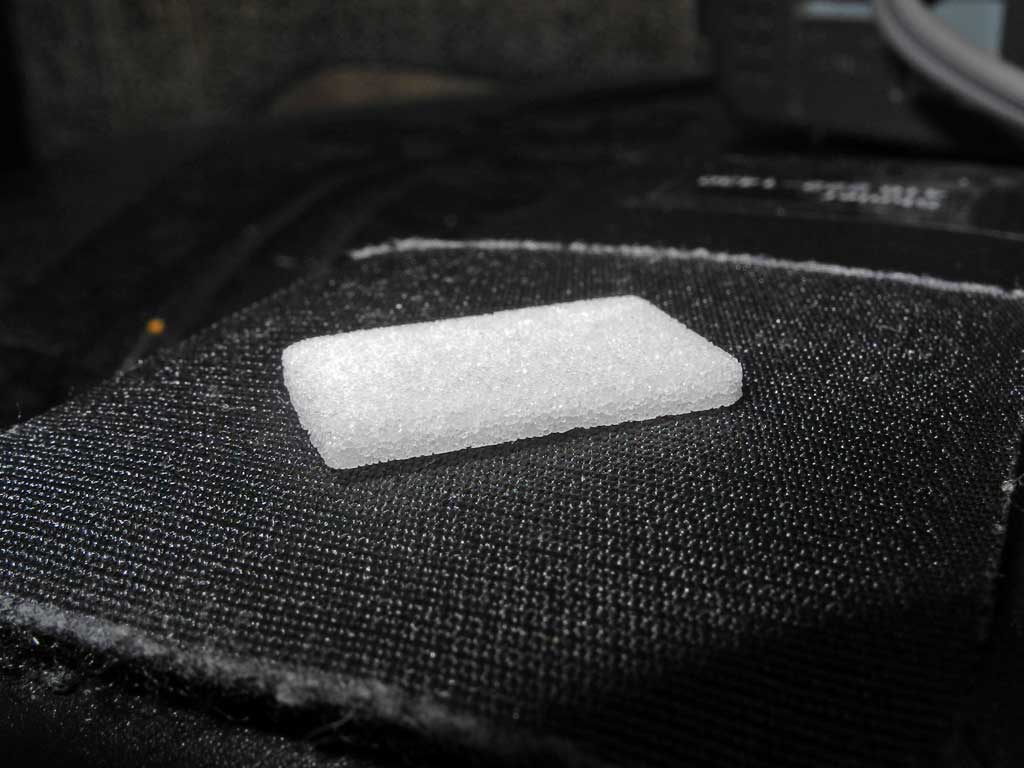
The white pad has two opposite corners chamfered (for example, see the bottom-right corner is cut off at a 45° angle), looking at the tray, it appears it can be inserted into the tray in any orientation.
Image 9 of 11
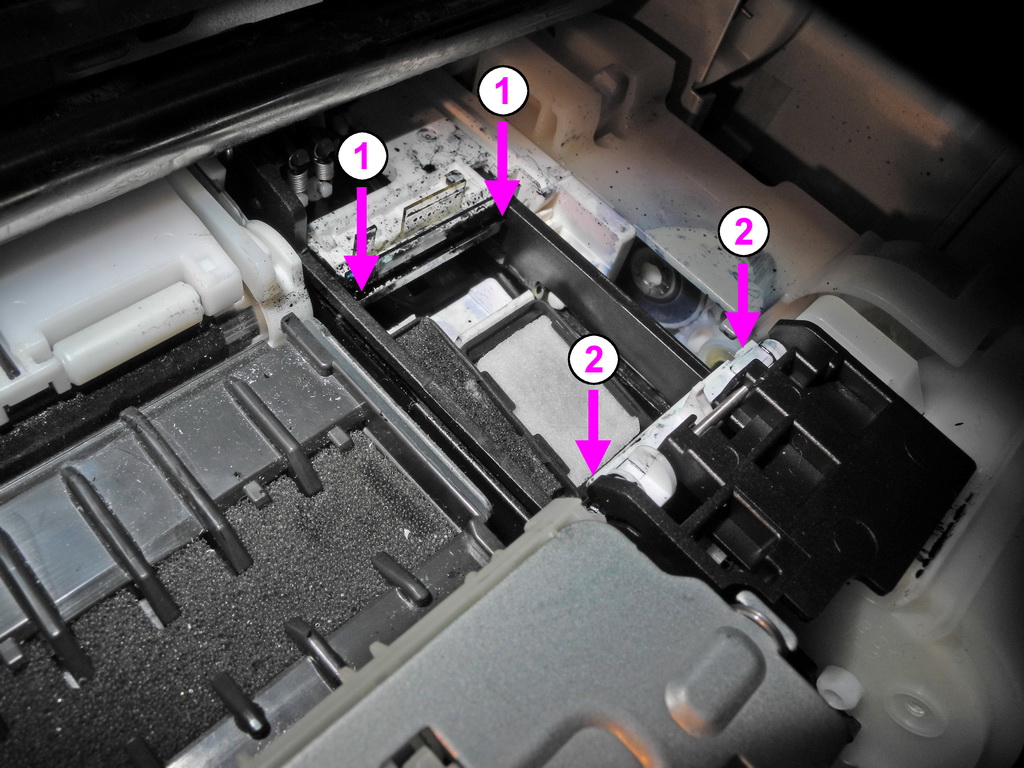
In addition to using damp paper towel to get ink off of the front of the squeegee along 1-1, there is a white plastic curved blade along 2-2 (it faces the squeegees and wipes the ink off them when they are fully-extended, the blade then pivots down and dumps the ink onto the pads). Use damp paper towels to clean this blade too.
I kept dabbing the wet paper strips towels gently along the front and below the clear squeegees, around the top of the slider for it, the pad trays, and the curved blade until little would come off onto the paper towels.
Image 10 of 11
If you find that the squeegee slider goes smoothly all the way back, and the pad try can be lifted easily, then all may be fixed. The pad tray probably won't return to the up position until you plug-in the printer again. So be sure all paper towels are removed, and the pads are seated properly, and plug-in the printer. The print head will return to the right, and after much moving and rotating, the printer parts will stop moving. Un-plug the printer again, slide the print head to the left, and see if the pad tray is in its normal up position as shown here.
Image 11 of 11
If this works for you, maybe fewer printers will get tossed into the garbage (and it would be even nicer if Canon would design their printers so it is easier to work on this part of their printers).
As a post script, I initially did this repair in January 2012, and all worked well for three years, until in February 2015 I again got the dreaded 6A00 error. I repeated this procedure, and in an hour or so, all was fixed again.